Cake
From PyroGuide
|
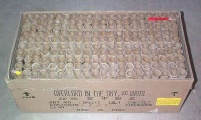
A cake firework, also known as a candle barrage is a firework comprising a series of roman candles or single shot tubes connected together. Typically, the internal fusing is set to fire each tube in series, or to fire several tubes at the same time, or a combination of these. Typically a cake will resemble from the outside a simple cube or other rectangular covered shape; after detonation, a large number of cardboard tubes (the candles) will be visible in the top of the firework (the paper cover having been blown off by the discharging stars). In a traditional cake, all the candles point upwards; a variant is called the fan or angle cake. Cakes are one of the most popular types of firework, as they can create spectacular and long-lasting effects from a single ignition while minimising safety concern. In the United Kingdom, the reclassification of aerial shells to Category 4 has popularised cakes as a method for achieving similar effects while staying within safety guidelines, particularly by firing multiple candles at the same time. The cake described here consists of a paper tube that is tightly sealed by a clay end plug on one side. Inside the paper tube, a lift charge and some stars are placed. The process is repeated for a number of tubes and then they are fused together with a sufficient length of visco fuse. The tubes are then bound together and device is glued to a wooden base for stability. When the cake is fired, the fuse ignites each tube one at a time and the stars are shot upwards into the sky. |
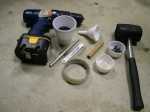
[edit] MaterialsCasing End plugs Fuse Lift charge Stars Rammer or wooden dowel Misc items |
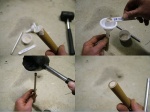
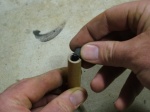
[edit] ConstructionTake the casing and seal one end of it with a small piece of paper tape. Stand the casing upright on a solid surface and using your funnel place a 1/4 of a teaspoon of powdered clay into the casing. Insert the rammer into the casing and with your rubber hammer give the rammer a few good thumps. Be careful not to hit it too hard as you may split your casing at the base rendering it useless. It just needs to be firm enough to compress the clay powder until it's hard. Your aim is to create a clay plug this is the same thickness as the inner diameter of your casing, in this case 10mm. You may need to add another 1/4 of a teaspoon of powder clay to achieve this. Remove the paper tape from the base to expose the clay end plug. |
|
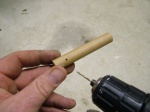
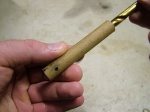
Use your drill to make a small 2mm hole just above the clay plug, this is where the visco fuse will be inserted. Do not drill a hole that is too large otherwise the internal pressure generated inside the casing will escape out of the hole and result in your effect stars not being ejected. Repeat this process for all the tubes that are going to be used in the cake device. |
|
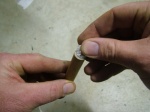
Lay the tubes out on the ground side by side and measure a good length of visco fuse so it is long enough to pass through each tube. Remember add about 20cm extra to all you time to retreat to a safe distance at effect time. Now insert the fuse into each tube through the hole you drilled above the clay end plug. It is a good idea to secure the fuse to the side of the first tube after feeding it through the hole with some paper tape as this will help prevent the tubes from sliding off. |
|
Take hold of the end tube (the one which will be ignited last) and carefully roll them all together. Secure the rolled up tubes with a good length of paper tape, wrapped tightly several times around. Next step is to load each tube with lift charge and stars. Stand the rolled tubes on a solid surface ready for loading. |
|
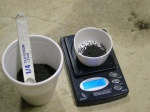
Weigh out 1 - 1.5 grams of lift powder using your digital scales or accurate powder measuring scope. Depending on the quality of your lift powder you may need to adjust this quantity. The stronger the powder the less you need to use and vice versa. If you are not sure of the performance quality of your powder, it is better to add less or do a star test to determine the correct amount. You don't want the cake casing exploding at effect time or throwing them so high and fast they fail to ignite. Add your lift powder to your casing using your funnel, tapping it to gently to settle the powder. |
|
Depending on their size, insert 1 or 2 stars inside the casing so they sit on top of the lift powder. If you have smaller stars and are in a position were you can insert more you will need to add a little meal powder so that it surrounds the stars. This will help to ignite them at effect time. You don't want half of your effect stars being shot into the air unlit. To add more effect to your cake you can use different star compositions, or you can use crossette stars. |
|
A small piece of tissue paper rolled into a ball can be used to gently plug the open end of the tubes to help prevent the contents from falling out during transport. However it is very important not to make the plug too tight otherwise the tube may explode. Secure the device on to a large stable piece of wood with some hot melt glue. You can also wrap some coloured paper around the finished device to give it a more professional appearance. |
|
The firework device and associated equipment must be properly secured so that the firework and equipment do not become disturbed, dislodged or knocked over, or having the orientation changed regardless of the nature during a display, through normal or abnormal functioning of the firework, adjacent firework or through any other activity. It is recommended that a firework cake be secured to ground with a minimum of two wooden or metal rods with several strong turns of wide adhesive tape. The ground should be solid enough to rigidly hold the stakes with no lateral or upward movement possible. |
|
Reloading You can reload your casing as long as the previous shoot has not damaged it. Give your casing at least 30 minutes to rest before reloading, as there may be some hot embers inside you can't see. This can be dangerous when you are reloading new black powder as it could ignite unexpectedly. Examine your fuse hole to ensure it is still in good condition and has not been burnt into a bigger hole. This also includes a good examination of the casing walls. If the casing walls are thick enough you should get several shots before having to retire it. Before reloading your tube, it is recommended you clean it will a large drill bit. Use a 9mm or 10 mm drill bit and with your fingers gently slide this inside the casing and twist to remove any unwanted dross. If you are not sure your casing can withstand another shoot then don't risk it. |
